


Now that you’ve successfully set up your wallet, you have to learn how to use it and the app that hosts it. This episode in the series will take you through every feature on your Zerion mobile app and how to utilize it for a seamless Web3 experience. Let’s go.
The Homepage
When you launch the app, it takes you to the Homepage where you'll find tabs at the bottom of your screen for easy navigation. Don't worry about the multiple icons yet - we will break each one down in time.
For now, focus on the two main sections: My Wallets and Watchlist.

My Wallets
Get a bird's eye view of your assets with just a glance!
This section displays the value of each wallet you have on your app and the total value of these wallets. Let's dive into this wallet's dashboard to access more features that allow you to manage your assets. Now, since there are no tokens in this wallet, Zerion is prompting us to purchase some with cash, but we’ll get to that later.

Transaction of Assets
The buttons outlined in the box at the top of the screen are what you’ll use to carry out transactions in your wallet.
Receive: Need to receive tokens? Tap this button to reveal your wallet address, and easily copy it for pasting to others. Alternatively, you can directly share it with the Share button at the bottom of the page.
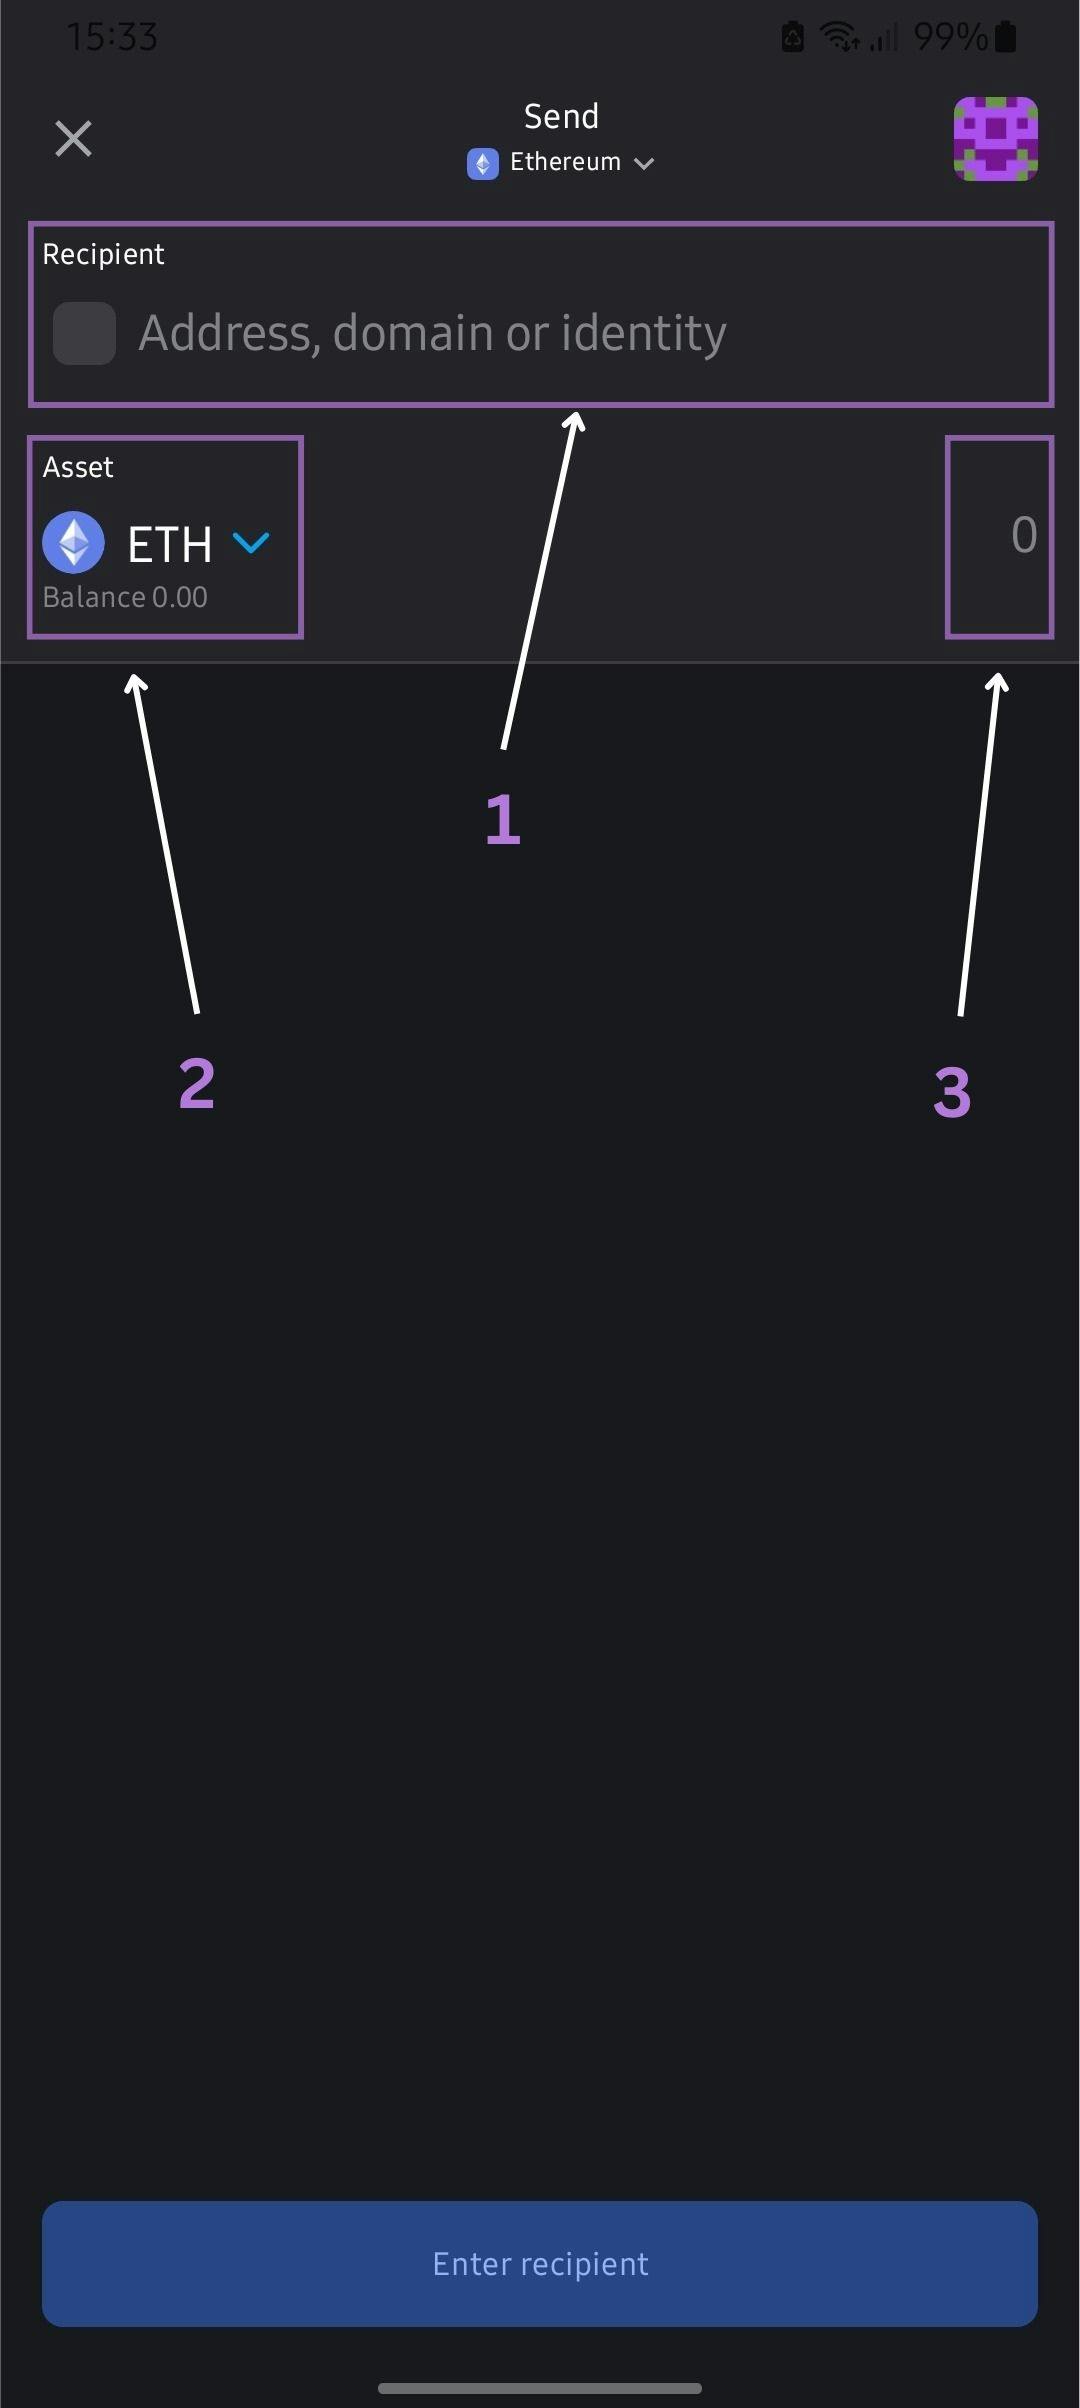
Send: With this, you can send crypto assets to any wallet you wish to send to. Here are quick steps for using this function:
Enter the recipient wallet address.
Select the token.
Input the amount you want to send.
Then proceed with the Send button and approve the transaction with your passcode/fingerprint.
Refer to the image below for a visual guide.
Swap: Need to exchange a token for another? This feature has you covered. For example, swap ETH for USDT, USDC, WBTC, and other supported tokens on the network. Ready to try a swap token? Here's a simple guide:
Select the token you want to swap from (e.g. ETH).
Select the token you want to receive (e.g. USDT).
Enter the amount you want to swap.
Review the details, then go ahead to swap and approve the transaction.
Refer to the image below for a visual guide.

Back on the wallet's dashboard, clicking the three-dots icon in the upper right corner will reveal more options.
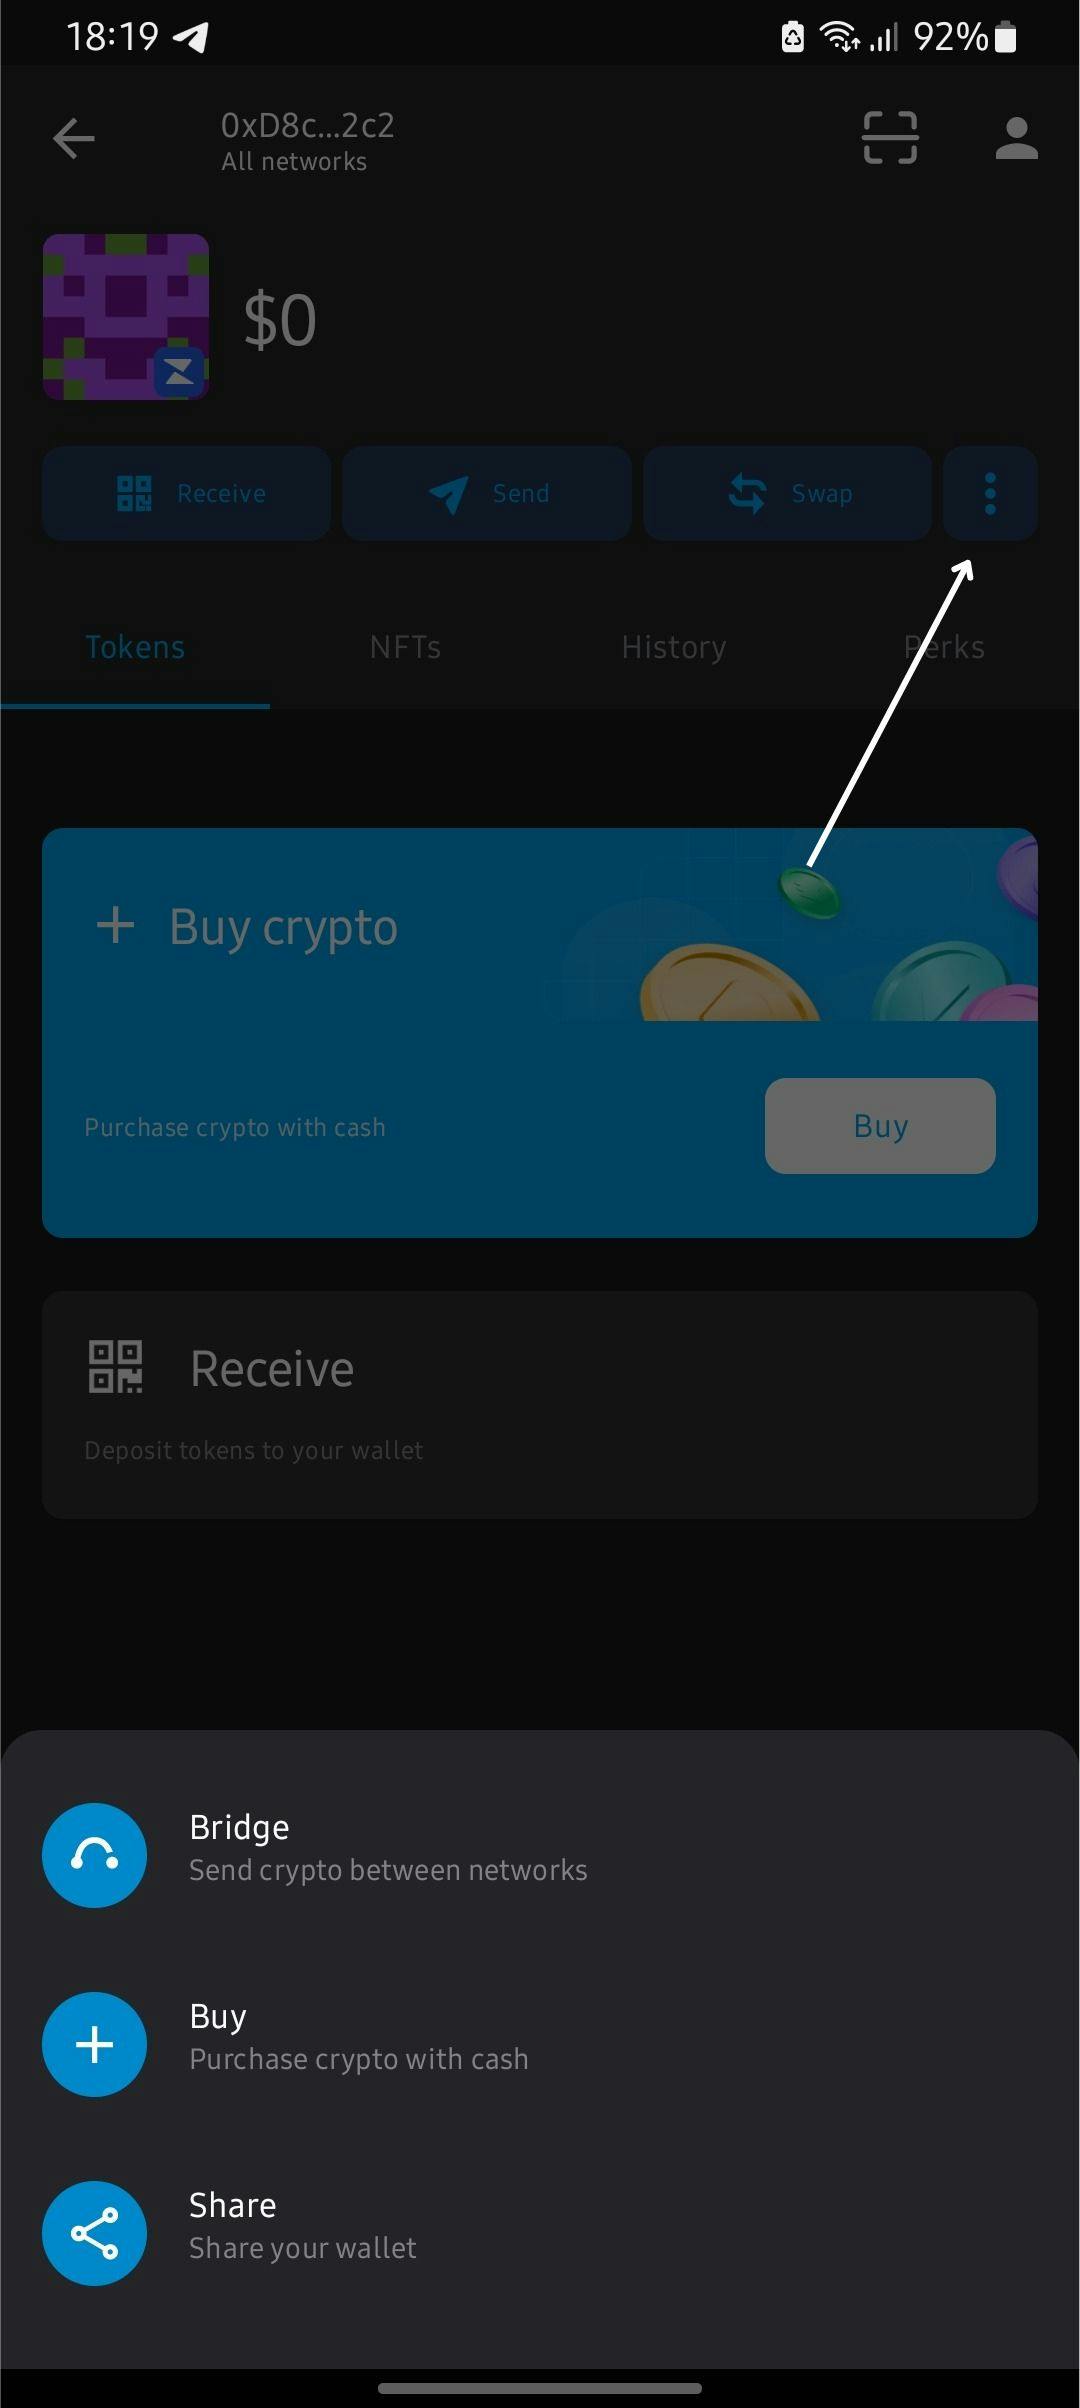
Bridge: In this context, "bridge" means to transfer assets between different networks. This function on the Zerion app lets you send tokens between different networks.
Buy: This feature provides you with the opportunity to buy crypto directly with cash. When you click on it, Zerion will provide a list of credible third parties you can purchase from.
Share Wallet: By sharing your wallet with others, you give them access to view the holdings and statistics of that wallet. Note that they can only view your wallets, they can’t carry out transactions on it.
Statistics of Assets
Explore your portfolio in detail with the tabs on your dashboard. Let's break down the functions of each tab.
Tokens: This tab details all your crypto holdings across any EVM network. Simply click on a token to unlock valuable insights on it like:
The amount in your wallet.
Its value in dollars (or your preferred currency).
The transactions you’ve carried out with it.
The performance of the token in the market and its effect on your holdings.
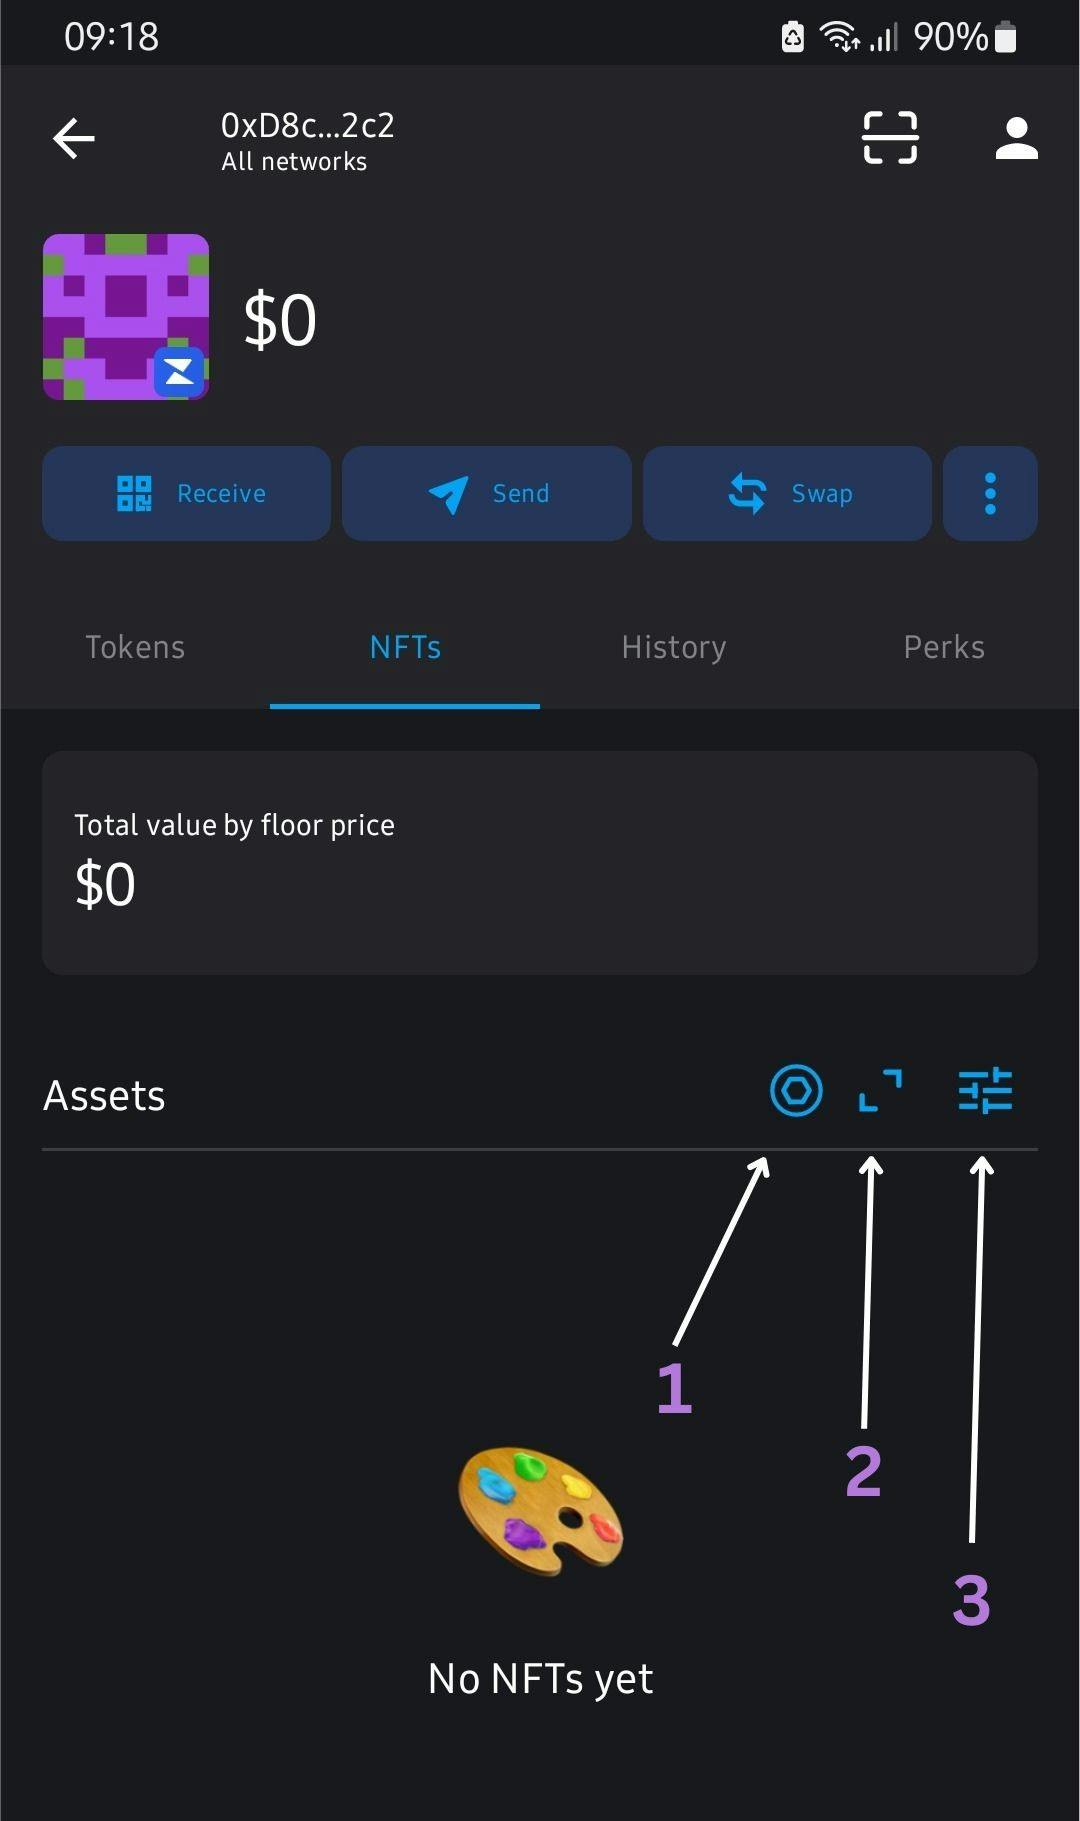
NFTs: This displays the non-fungible tokens (NFTs) contained in your wallet across all EVM networks. Clicking on an NFT reveals in-depth stats on it, including its individual properties and the collection it belongs to. The features on this tab allow you to customize how your NFTs are displayed.
Toggle between showing the value in dollars, or in the native currency of the network the NFT exists on. For example, you can see the values for NFTs on Ethereum in ETH or in USD.
Switch between browsing your NFTs in a gallery view or list view
Sort your NFTs based on the categories provided: recently added, oldest, lowest highest value, or highest to lowest value. You can also filter them by collection, to display only NFTs of a certain collection(s).
Refer to the image below for a visual guide.
History: This tab methodically documents every activity of your wallet, from incoming tokens and sent assets, to smart contracts you've signed.
Perks: Step into Web3's inner circle with this special feature of the Zerion app. It provides you with great opportunities like:
Tasks you can participate in to be eligible for future rewards.
Priority access to the presale of new projects.
Insights into upcoming projects with promising potential.
Utilizing all these will give you a powerful advantage in the crypto space. Keep an eye on this tab and be ready to charge into action when these lucrative opportunities come knocking.

Now, let’s go back to the Home page and check out the Watchlist section.
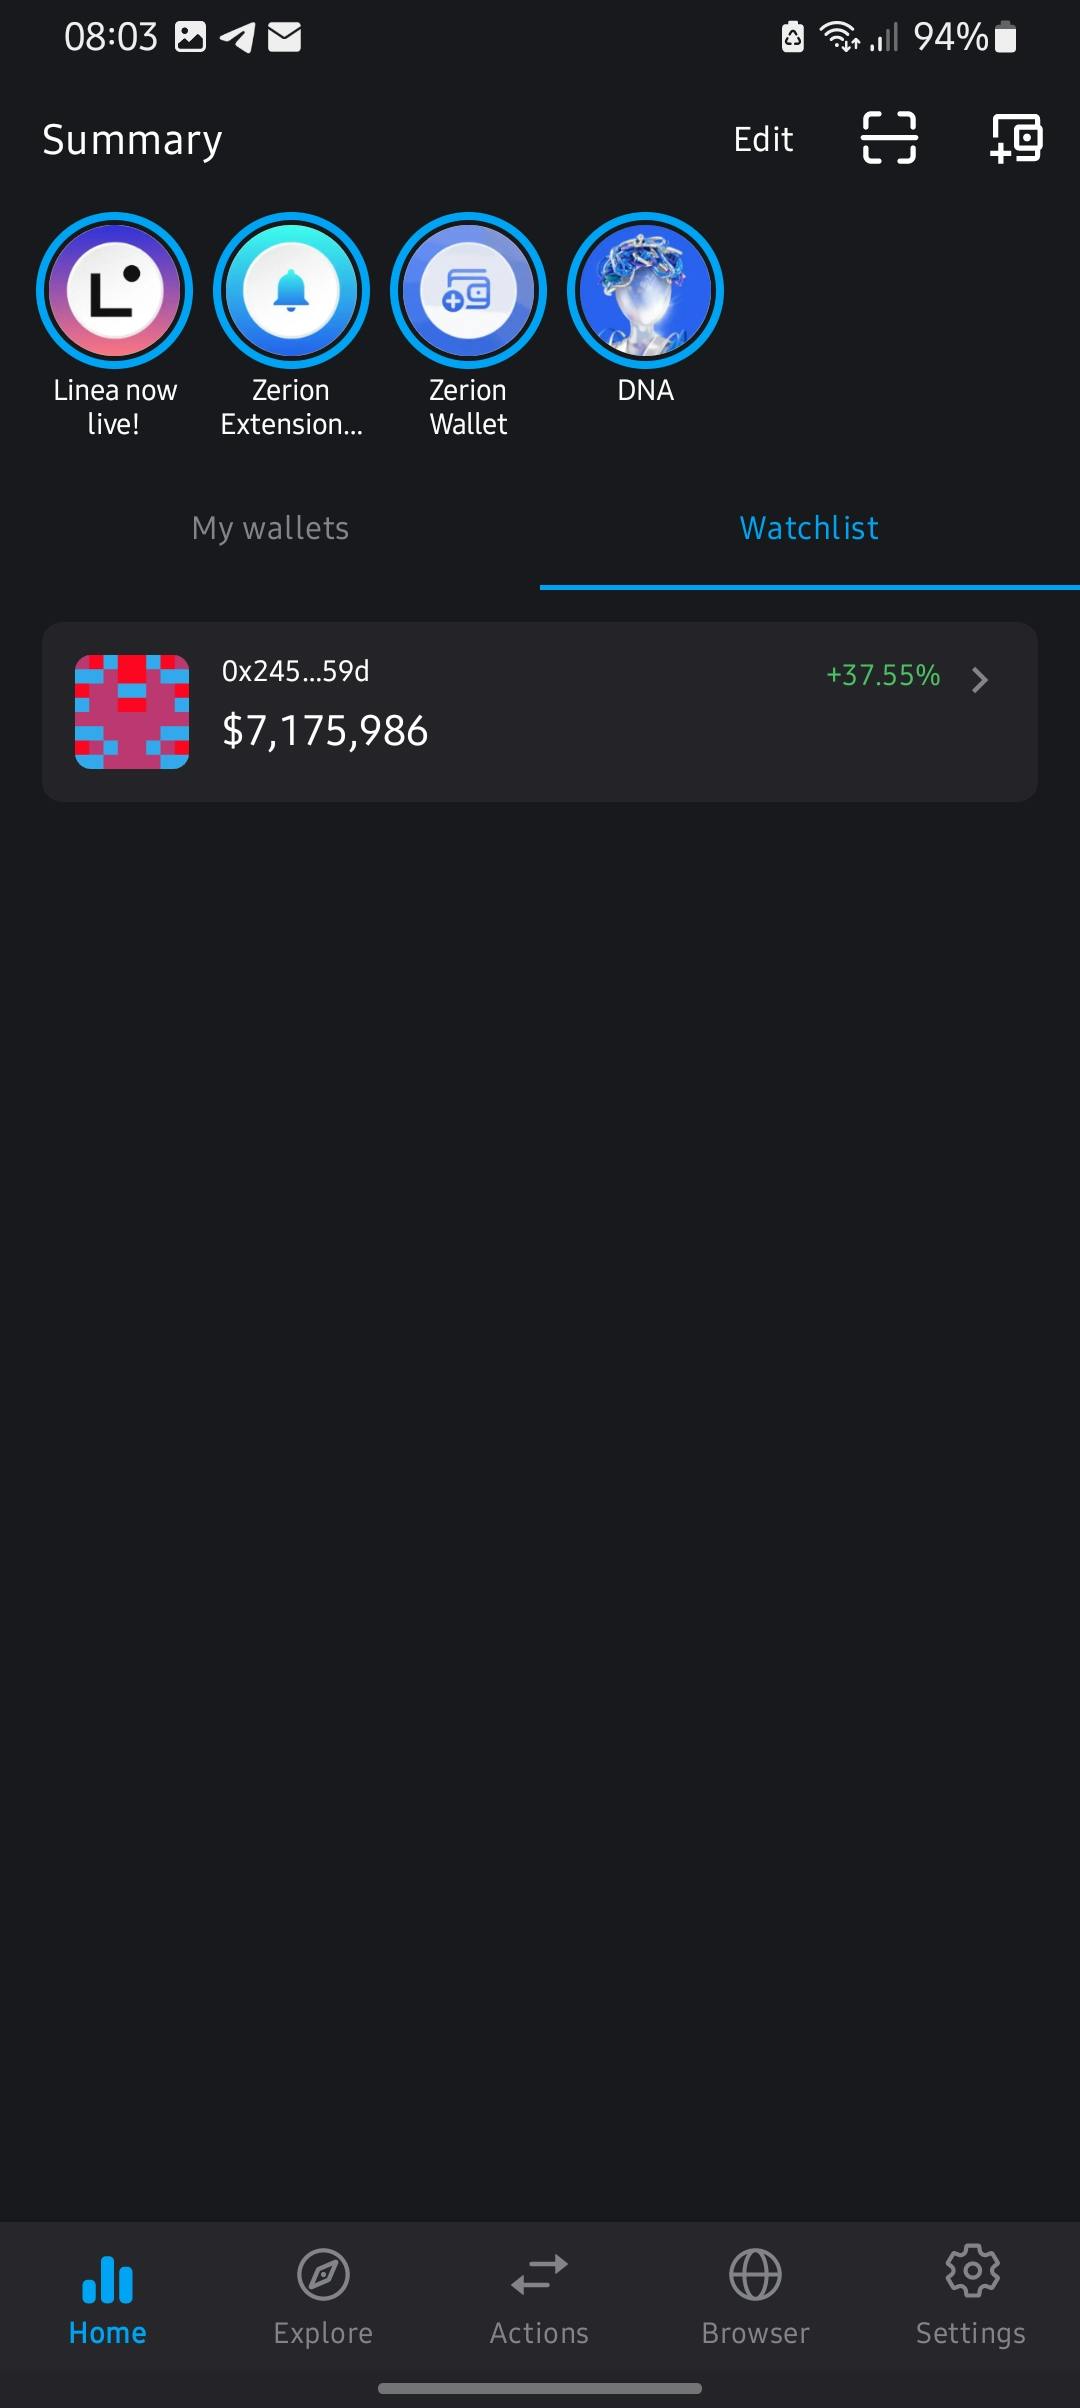
Watchlist
Stay ahead of the game and track the activities of influential wallets with Zerion's Watchlist.
If there’s a wallet whose assets and activities you’d like to track – maybe a whale’s wallet or even your own personal portfolio – this section empowers you to do that effectively. Here's how to add a wallet to your Watchlist:
Copy the address of the wallet you want to track.
Click the dotted box in the section.
Click the Paste button to paste the address into the textbox.
Click Continue.
When prompted, select Watchlist as the desired destination.
Click Add to finalize the process.
Now Zerion will provide you with timely notifications on the activities carried out by the tracked wallet.
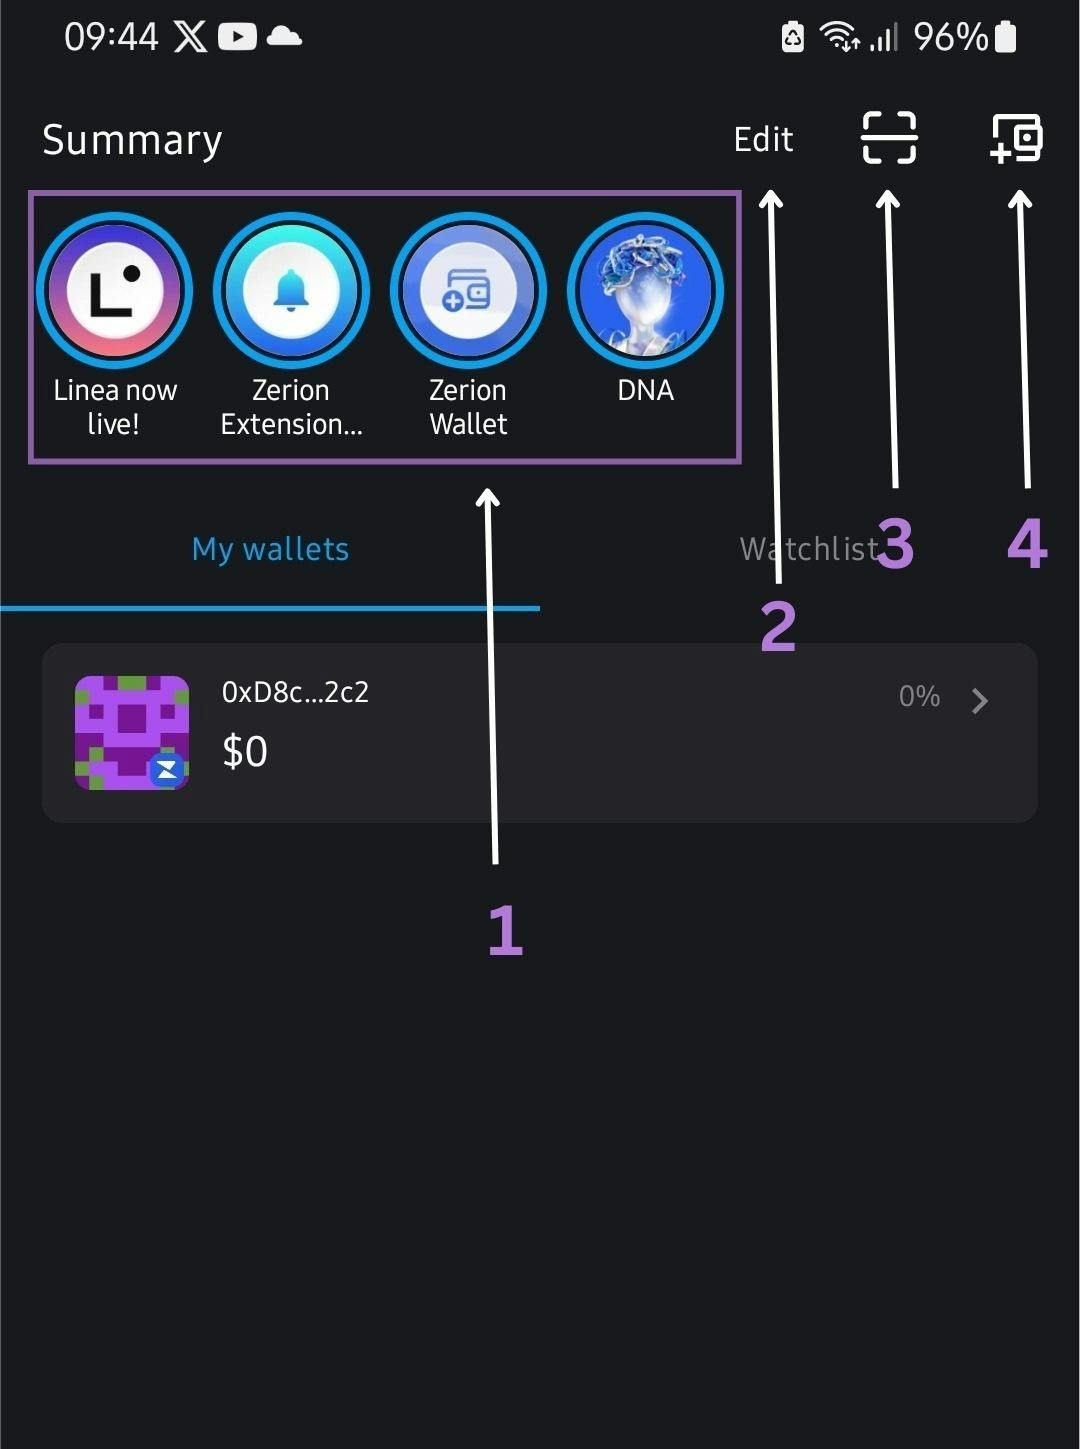
If you're curious about the Summary section and the icons beside it at the top of the Homepage don't leave just yet. Come along for a quick explanation of each.
Summary: Zerion uses this section to highlight recently launched features or those that are being worked on, for users.
A simple function allows you to prioritize your most important wallets by arranging them between My Wallets and Watchlist sections.
This sleek QR-code scanner helps you conduct transactions quickly and connect easily to Web3 apps, all with a simple scan.
This handy icon brings up a list of options for you to seamlessly add new wallets to your Zerion app. Choose from importing old wallets, connecting to other wallets on your device, or creating brand new wallets on the Blockchain.
Refer to the image below for a visual guide.
Now that you're equipped with knowledge about the Homepage, we shall embark on a deeper exploration of the other tabs in the next article, learning how they can help you utilize your wallet to navigate Web3 better. Thank you for reading!